Blog

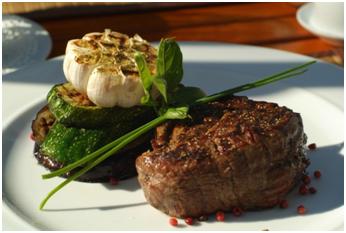
6 Food Photography Tips to Make Your Food Look Amazing

November 10th, 2014

Photographing food is something that isn’t so easy to master, but most photographers will have to take a photograph of a meal at some point. It’s often difficult to make food look as appetising on a photograph as it is in person and you’ll be against the clock to take the photograph while the food is freshly cooked. Here are a few tips to help you with your food photography.

Choose the freshest ingredients

Meals that are cooked with fresh food look far more appealing than meals cooked with withered or wrinkled food. To make the food look as delicious as you can, always use vegetables and meat that are very fresh, or at least look very fresh. When you are photographing food, it is often up close so even the tiniest bit of damage will show up. That being said, if you can cover up the bad bits and make it look good then it will work fine!

Lighting

You can change a lot about how the food looks simply by using the right lighting for the job. Using a back light will make the food look more fresh, tasty and will make steam look more pronounced. When you don’t use lighting, the food will tend to look flat; not at all delicious. You don’t need professional photography lighting; experiment with different lights at different angles to see what makes your food look more delicious.

Props

Using props in a photo can make it look a bit more interesting than just a bowl of food. A great idea is to use the raw ingredients around the meal. Make sure that you are using non-patterned plates to make the food stand out, and always use the correct plate for the food. If you serve the food up as if you were plating-up food in a restaurant then you should be fine.

Before and after

It is often more interesting to take at least one photo while the food is cooking and one of the finished meal. This is great if you are taking your photograph for a cookbook, as it helps show the process. This is an especially good idea for meals that look better when they are cooking than when they are cooked; most soups are an example of this. If you want to add a human element to a photograph you can have a hand holding the utensil in the photo.


Don’t cook completely

Although it seems more natural to completely cook the food and take a photograph of the finished meal, this is not a good idea as the food will continue to cook after you have finished cooking it. If you stopped cooking the food when it was ready, by the time you may have taken a photograph the food may have gone soft. It is often a good idea to serve the food just before it is ready to ensure it looks fresh in the photograph.

Brush on oil or mist with water

This is a brilliant tip to make your food look fresh. Brush on a little oil or mist vegetables with water and the light will shine off in a way that makes the dish look very fresh. Make sure you don’t go overboard with either or you may end up with wet or greasy looking vegetables!


If you are looking to upgrade your camera, our camera exchange services can help you get money for your old model, making it easier and more affordable to get a new camera. For more information, contact us today on 0208 371 4179 and we’ll get a quote to you within two hours.

Celebrating 50 Years of the Wildlife Photographer of the Year Competition

October 16th, 2014

This month will see an exciting new exhibition open at the Natural History Museum in London, celebrating the art of wildlife photography. The exhibition, entitled The Wildlife Photographer of the Year 2014, will be opening from the 24th of October and will showcase some truly awe-inspiring photographs of our natural world.

The Wildlife Photographer of the Year competition is jointly organised by the Natural History Museum and BBC Worldwide, and is one of the most exciting and prestigious photography competitions of its kind. The competition comprises a total of 10 categories, including mammals, underwater species, natural design, and birds, and receives thousand of entries each year from across the globe.

The finalists of this year’s competition were recently announced and include this dramatic piece, titled Dante’s Inferno by photographer Karen Lunney. The overall winner will be revealed later this month.

Interestingly, this year’s exhibition will follow a slightly different format from that of previous years. Indeed, with the competition now entering its 50th year, the 2014 exhibition will celebrate the achievement of 50 years of stunning wildlife photography. Visitors will have the opportunity to view some truly spectacular images of both new, and also historic award-winning photographs. In this regard the exhibition will also aim to demonstrate how wildlife photography has changed and evolved over the years and it’s sure to captivate and inspire both photography and wildlife enthusiast alike.


According to The Independent wildlife photography is also growing increasingly popular among amateurs. A key reason for this is that, thanks to the development of new technology, wildlife photography is now easier and more accessible than ever. If you fancy entering next year’s competition, which is open to professionals, amateurs and young photographers alike, then admissions will be accepted from the 5th January until the 27th February 2015.

If this has inspired you to try out some wildlife photography of your own then here at Camera Exchange Store we can help. We specialise in camera trade-in services, and used camera exchange so you can get the equipment you need. For more information about our range of services please don’t hesitate to contact us and a member of our friendly team will be happy to help you with your enquiries.

When The Lights Go Down: Low Light Photography Tips

October 13th, 2014

One thing that is vitally important to photography is light; it can have a tremendous effect on the quality of your images, so knowing how to work with different light levels can make all the difference in the world.

As the autumn weather closes in, the days get shorter and greyer and you will find that you’re more frequently trying to take pictures in low light conditions. Here are a few tips to help you ensure that they come out beautifully.


Use Higher Shutter Speeds

One of the most common problems you’ll have with low light photography is that your pictures will often come out blurry. This is due to camera shake or objects moving while the shutter operates. Increasing your shutter speed will help to reduce this issue. For day to day photography, a speed of around 1/200th-1/250th of a second should work well, but it will depend on the focal length of your lens.

Increase ISO

Increasing your ISO makes the shutter collect light faster – and effectively increases your shutter speed. This means that if you’ve got the shutter speed as high as it can go, but you’re still getting blurry images, you can increase the ISO to further reduce shake. Remember, however, that higher ISO can create a grainier image.


Get Closer to the Light

If you can get your camera closer to the source of the light, it’ll be able to use more of it and give you a better image. If you’re shooting indoors, look for curtains, blinds or even doors that you can open to allow more natural light in.

Get Steady

The most obvious method of reducing camera shake in low light conditions is simply to hold your camera steadier. You won’t always be able to use a tripod, but you can use your left hand to support the camera and, if the angle works, kneel down with one knee up to support your elbow.


Watch the Autofocus

In low light conditions, many cameras have difficulty picking up details for autofocus. One option is obviously to use manual focus in low light, but if you prefer AF, look for a camera which has an AF Assist light on the front

Paint with Light

In dark conditions, you can use a longer exposure and flashlight to paint the shot with light – you will need to set your camera steady, and while the exposure is taken point your light at different areas to light it up.

If your camera doesn’t give you the functionality you need to take great pictures in low light, our camera exchange service is a great way to upgrade, giving you money for your old model to go towards the new. For more information, contact us on 0208 371 4179 today.

Photography – Things Not To Do: Part 1

October 8th, 2014

It’s all well and good reading article after article about what to do for the perfect photo. You also need to know what to avoid doing so you can create amazing photos every time!

Here are a couple of things we suggest you take note of. Pen and paper at the ready?

Copy Work… Exactly

They say imitation is the sincerest form of flattery. But if you’re taking photos that have already been taken, it’s kind of a waste of time. DEFINITELY be inspired though. Photography is an art form itself, so collate your inspirational works and put your own spin on them!


Is The Background Right?

When taking photos the whole point is to be able to distinguish the subject, right? So if your subject is wearing a lovely floral dress, don’t photograph them in front of a bed of flowers!

Essentially make sure your subject doesn’t blend in with the background; in this example, floral prints should be taken on bold coloured backgrounds to really make the colour pop out!

 Ignore Them After They’ve Been Posted

Today, most people just post their pictures online and do nothing else. It’s one of the saddest things that has happened to photography in this new digital age! Print photos out! Make scrap books! They are better to share about with guests too! Trust us; you’ll be glad you printed them out!


So if you’re looking to take your photography to the next level and want to upgrade your equipment, we offer the best deals online for camera exchange! We will take all camera bodies and lenses at fantastic rates, so don’t hold on any longer and upgrade your equipment now! Contact us on 0208 371 4179 and talk to a member of staff now!

DIY Photography Hacks

October 7th, 2014

Photography really is all about experimenting to achieve that perfect stand out shot! But getting a professional camera can be costly enough, without having to spend even more hard earned money getting all the accessories to create the different ‘cool’ effects.

So how can you create those artsy shots on a budget?

Here we have some of our favourite photography hacks to help you achieve some breathtaking shots!

Tip 1

Turn off that automatic mode! It’s not helpful when trying to create amazing shots at all! One main automatic feature you should drop first is the automatic flash!

It would appear that camera manufacturers are super-eager to make the flash pop up at the first sign of darkness!

All you have to do instead is keep the flash closed and increase the ISO! In the majority of camera modes, increasing your ISO will cause the camera to increase shutter speed to freeze people in place, using the ambient light!

Tip 2

We have all seen those professional looking portraits with brilliant lighting, highlighting just the right bits! Well, those pro’s use a beauty dish for lighting, and because this post is all about hacks, we are going to tell you how to achieve the same effect using a turkey pan!

It’s simple enough, just mount your flash to the centre of the pan and cover the end of your flash with foil too.

Tip 3

The Bokah effect is a great way to make your photos fit in with the arty crowd!

What’s even better is you can achieve this by simply cutting a desired shape into some card and fixing it to your lens. For all the ideal camera settings and extra tips read this article!


If you’re looking to upgrade your equipment and experiment with some new goodies we offer the best deals in camera exchange on the internet! So if you decide to dig out the unused Canon and feel that you need a newer model, contact us on 0208 371 4179 and we will give you a fantastic offer!

Apple Unveils New iPhone 6 Enhanced Camera Specs

September 11th, 2014

So now we know precisely what it was Apple had up their sleeve – or in their pocket. Tuesday’s much-hyped press event hosted by Apple CEO Tim Cook saw the tech company unveil the Apple Watch, alongside the new iPhone 6 and its bigger-screened brother the iPhone 6 Plus. And it’s good news for photography enthusiasts.


At first glance there seems to be little difference between the iPhone 6 range and its predecessor, the iPhone 5s. Both have 8 megapixel cameras, for instance, with pixel size standing at 1.5 microns and an F/2.2 aperture. But that’s where the photographic similarities end. As Apple is acutely aware, with the smartphone market continuing to grow, they’ve had to seriously up their game.


Sure, as we said, it may only be 8 megapixels, but it’s what comes with that that really counts. Dubbed the iSight, the iPhone 6’s camera has been significantly improved since the iPhone 5, with a whole host of great specs coming with it.


Firstly, there’s a definite improvement on facial recognition and exposure control, and the camera now captures 81% more light. So whether you’re using the camera for Apple’s video conferencing app FaceTime, or to take photographs, you won’t be left in the dark. The HDR – or high dynamic range – means faster processing of your photos too. There is also a new burst mode with the capability of snapping 10 photos a second. iPhone 6 will even take the guess-work out of choosing which photos to keep, as it suggests which photos are best.


One of the big announcements was that the iPhone 6 and iPhone 6 Plus now has an on-sensor phase-detection autofocus. This is a serious upgrade from previous iterations of the smartphone which used contrast-detect autofocus. Apple is calling this Focus Pixels, with the on-sensor pixels dedicating themselves to focus distance.


The iPhone 6 Plus also comes with enhanced image and video stabilisation. Video recording, too, have been vastly improved upon. The new iPhone has the ability to capture images at 1080p HD at 60fps. There’s even a slo-mo option which records at 240fps, and the ability to take time-lapse videos. Although we’ll have to wait until we get our hands on one to really test its mettle, the iPhone 6 is shaping up to be a great camera phone. Some commentators in the industry are even suggesting that the photos represent near-DSLR quality, and if these sorts of advances continue, phones could well begin competing seriously with traditional cameras in the public sphere.


Here at the Camera Exchange Store, we’re truly passionate about photography. So if you’re looking to sell your digital camera, just contact us today and discover how our professional staff can help.

How To Take Awesome Autumnal Photos

September 5th, 2014

Autumn is approaching, and with it the opportunity to take some absolutely amazing pictures using the beautiful colours of the season. Whilst of course there’s every chance you’ll get lucky and get awesome pictures anyway, the old maxim applies – the harder you work, the luckier you’ll get. Here are some ways to maximise the effect of your autumn photos.

Be Prepared

Autumn foliage will only be at its peak for a short period – and although you may see people saying that the best times are towards October and November, this can vary considerably based on weather conditions. Because we’ve had a pretty warm summer, it may be earlier this year – so keep an eye on the leaves, and be ready to grab your camera as soon as the right conditions arrive.


Use the Golden Hour

Get your diary out, and start making note of the sunrise and sunset times for the days when you want to go out with your camera. The “Golden Hour” is the first hour after sunrise and the last hour before sunset, and at these times the angle of the sun makes the light softer and warmer – perfect for bringing out the rich hues of autumn leaves. The best thing is, in autumn the golden hour tends to be at more sociable times than it is in summer!


Use Water

If you can find a location with stunning autumn trees standing over water – and there are so many lakes, rivers and canals around that this should not be a problem – you can create a great contrast between the warm reds and golds of the leaves and the cool blue of the water. If you’re really lucky, and the water is still, you may be able to use the reflection of the trees as a focus instead of the trees themselves, which can create stunning images.


Use the Clouds

Summer skies tend to be clear blue expanses – lovely accents to a picture, but not so interesting on their own. In autumn, however, as the weather changes you can spot some stunning cloud effects which can be used to add interest to your images – or even as the focus by themselves.


Experiment with Settings

You’ll want to try a few different things to find the best settings for each picture; a little underexposure can make colours stronger, or you can try using a higher ISO instead of auto white balance to warm colours up. You can also use some settings creatively, to create dreamy autumn woodlands or almost surreal high-definition colours, so don’t be afraid to experiment.


If you want to get a better camera in time for autumn, now is the time to upgrade; with our camera exchange services, you can get money for your old model, making it easier and more affordable to upgrade. For more information, contact us today.

The History Of The Camera [Infographic]

September 4th, 2014

The development of the camera has drastically changed over the last few hundreds of years like most of our technology. Here at Camera Exchange Store we have created this infographic to show a timeline of the development!

The Majesty of Cat Photos

August 12th, 2014

If the internet has taught us anything, it is that people love photographs of cats. Sometimes other animals get a look in, but there’s no denying that when it comes online photos of cute animals, the cats take the crown. Here at the Camera Exchange Store, we can’t quite put our finger on what it is about cats that makes them beloved by all online. Perhaps it’s their inherent cuteness, their snooty aloofness or maybe even something altogether more sinister. A cat conspiracy? Possible, but it’s probably more likely to be their expressive nature, making them the perfect canvas for anthropomorphising (attributing human characteristics to non-human things, basically how Walt Disney made his stack).

If the cats are here to stay, then it’s only natural that any budding photographer will want to get in on the action and take some cat photos of their own. So here it is, the Camera Exchange Store’s guide to cat photos!

Keep your camera on you at all times!

Cats are unpredictable. They’re not going to wait around whilst you take light readings and carefully frame a shot. The first and foremost rule of the accomplished cat photographer is to have your camera handy. You can never be sure when you’re going to catch your cat doing something funny or cute, so always be prepared to capture the moment.

Curiosity…

Apparently, curiosity killed the cat. But, for a photographer a cat’s natural curiosity can easily be exploited to get your subject’s attention. Throw some small pebbles at the spot you want your cat to be, they’ll usually investigate the noise and movement. Want the cat to look at you and the camera? Rustle some material or paper, ring a small bell, your cat won’t be able to resist having a look.
Of course, if all else fails treats are definitely a good way to go about getting your cat’s attention.

Avoid using a flash.

Most cats will probably find a flash going off in their face extremely perturbing and you may end up being. Not only that, but the flash photography makes a cat’s eyes look very unusual and almost demonic. Perhaps, a reflection of their true nature? Who knows? What we do know is that it is best to photograph your cat during the day. Make the most of the natural light.

Get down low.

If you get down to the cat’s level, then you’re likely to produce a photograph with a much nicer composition. Who wants to see a photo taken from above, your feet in shot with the cat looking indifferently at something in the distance? You may feel a little ridiculous or uncomfortable lying down on your front or crawling about on your hands and knees, but by getting down to eye level with your cat, you’ll take a better photograph.

Have Patience!

We really cannot overemphasise the need for patience when it comes to photographing cats, or any animals for that matter. All animals, cats especially, can be unpredictable, so you’ll have to accept that fact that not every photo you take will be brilliant Don’t try and force a good photo, let it happen naturally, the end result will be worth the investment of your time. Plus, by trying to force your cat to do something they don’t want to go you’re likely to agitate it, which of course isn’t good for the cat, but also isn’t good for you. Claws, remember?

Well there you have it, five tips that should help you to get a great photograph of your pet cat. Working with animals is never easy, but with enough trial and error you will eventually get an excellent shot. You never know, your picture may be good enough to make a Buzzfeed cat countdown…!

We certainly hope you enjoyed this blog, which certainly wasn’t just an excuse to post photographs of cats that we like. Check out the rest of the blogs on our site were you’ll find plenty of great tips, advice and news about the photography. Also, if you’ve got got old cameras and photography equipment lying around doing nothing, then why not give us a call on 0208 371 4179? We’ll get a quote to you within two hours!

Basic Photography Tips for Bloggers

August 11th, 2014


Many individual bloggers, at some point in their online career, will want to add photos to their blog. Humans are incredibly visual, and followers of blogs will appreciate photos alongside textual descriptions.

Beauty bloggers like to take photos of the various products that they use or include make-up tutorials, food bloggers often take photos of the dishes that they make and review blogs could benefit from adding photos of various products to their blog. However, many bloggers blog as a hobby and don’t necessarily have any background in photography.

Here are some tips for bloggers who want to take good quality, clear and professional-looking photographs!


Aperture

The aperture of a lens is the opening at which light passes through and most cameras have a setting to change the aperture. The openings have been standardised into specific sizes, called aperture stops, or F-stops.

The larger the F-stop number is, the smaller the opening is. In other words, a larger number means that less light will enter the camera. A smaller F-stop number means the opening is larger, meaning more light will enter the camera.

A smaller F-stop will have a faster shutter speed and smaller F-stops (larger openings) are great for portraits, where the main subject of the photo is a person. By the same coin, larger F-stops (smaller openings) are great for landscape shots, where there is huge landscape that is the main subject.

Low F-stops mean a blurry background. High F-stops mean a clear, sharp background.

If you want to photograph an object, and you’d like the object to be clear and the background to be blurry, pick a low F-   stop on your camera.
Alternatively, if you would like the whole picture to be crisp, pick a high F-stop.


Shutter Speed

The higher the shutter speed, the darker the photo will be, and the lower the shutter speed, the brighter the photo will be. It is best to set up the shot, adjust the settings as needed, and then take the photo as you may wish to have some photos brighter than others.


Background

Invest in a suitable background if you are going to be photographing products. A tri-fold white foam board or a plain white poster board will work well. Alternatively, use a black or white tile for smaller items.

It is always best to shoot in natural light, like near a window. However, if you don’t have the option of being close to a source of natural light, you may wish to invest in some daylight light bulbs, which mimic real daylight.


Get Creative

Are you a food blogger? The video below shows you how to get amazingly appetizing shots of food!


If you are looking to be creative on a budget, this short video shows seven ways to use household objects in your photography!


If you feel that you need a more advanced camera for your blogging endeavours, and are looking for a camera exchange, then look no further than the Camera Exchange Store! You can sell your old camera to us in three simple steps, and will offer you a quote in less than 2 hours. For more information about the process, please feel free to contact us by phone on 0208 371 4179 or by email at info@cameraexchangestore.co.uk.